
How To … Buy, Print and Colour-in using ClickNColour Designs.
How to Buy
- Note, all prices are in Australian Dollars. You can pay in your own currency via PayPal.
- Add your selected images to your "shopping cart" by clicking on the
 button.
  View Cart contents to check the list of artwork to be purchased and to see the total price.
- Proceed to Checkout.
- Pay by PayPal or credit card.

- If paying by PayPal, you will immediately be sent an e-mail and/or shown a web page with personalised links to down-load full-size copies of your selected artwork.
If paying by a method other than PayPal, your e-mail will be sent as soon as your payment clears. - Your download link(s) will remain active for about 24 hours.
- For each item in your shopping cart, you will download a .ZIP file containing one or more high resolution 24-bit colour .BMP images.
- Take note of where you saved the downloaded .ZIP file.
- Open the .ZIP file (usually by double-clicking on it) and copy the .BMP file(s) to a work area.
- You should keep a copy of the downloaded .ZIP file in a safe place.
Go to top of page
How to Print your Designs
- Start the Paint program (Start, Programs, Accessories, Paint)
- Open your .BMP file (File, Open…)
- Go to Page Setup (File, Page Setup…)
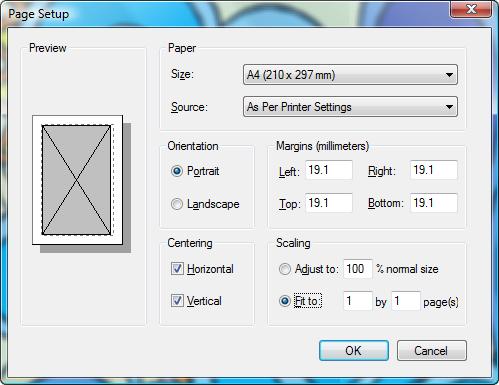
- Select Paper Size: typically "Letter" in the US, "A4" elsewhere.
- Select Orientation: "Portrait" or "Landscape" depending on the shape of your image.
- Set Centering: Selecting both "Horizontal" and "Vertical" is usually best for artwork.
- Set Scaling: Selecting "Fit to 1 by 1 page(s)" is usually best for artwork.
- Click "OK" to close Page Setup with your new settings.
- Print your design (File, Print…)
Go to top of page
How to Colour-in on Paper
- Start the Paint program (Start, Programs, Accessories, Paint)
- Open the original black and white .BMP file which you extracted from the down-loaded .ZIP file. (File, Open…)
- Print your design according to the instructions above.
- Have Fun!
Go to top of page
How to Colour-in on Screen
- Start the Paint program (Start, Programs, Accessories, Paint)
- Open the original black and white .BMP file which you extracted from the down-loaded .ZIP file. (File, Open…)
- Immediately save it with another name that identifies it as yours. (File, Save As…)
- Select a colour by left-clicking on the colour palette.
- You can create your own colours. (Colors, Edit Colors…)
- Use the pencil and paintbucket tool to colour-in.
- When things go wrong: Occasionally you will click in the wrong place and accidentally turn all the black lines into a colour. Don't panic. Ctrl+Z or (Edit, Undo) is your friend.
- Enjoy being creative!
- When your masterpiece is ready, print your design according to the instructions above.
- Don't forget to save your masterpiece. (File, Save)
A tip on editing colours
In Paint, you can create your own set of custom colours.
(Colors, Edit Colors…, Define Custom Colors…)
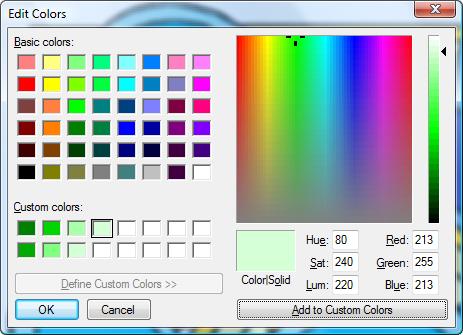
To create the range of complimentary green Custom colours in the dialog box above,
Hue was set to 80 (green)
Saturation was set to 240 (the maximum) and
Luminance (lightness) was varied from 120 up to 220 in steps of 20.
Go to top of page
How to use the Art Alphabet … to create words and names
Debbie's YouTube video showing how to use her Art Alphabet to create words, names and signs in Microsoft Paint.
Go to top of page